When designing injection molds, focus on precise surface finish, consistent wall thickness, and efficient resin flow. Optimize draft angles for smooth release, integrate radii for durability, and manage resin flow direction. Minimize defects by evaluating tolerable flaws and strategically placing ribs. Eliminate undercuts in tooling for faster production. Design for manufacturability by maintaining uniformity and adding draft angles. Validate designs early with rapid prototyping for excellent performance. Master these tips for effective injection mold design to enhance quality and efficiency across the production process.
Consider Surface Finish Selection
Consider carefully selecting the surface finish for your injection mold design as it greatly influences the appearance, texture, and functionality of the final part. When designing your mold, the surface finish plays a vital role in achieving the desired aesthetic and functional requirements.
The design of the mold needs to take into account the wall thickness of the part being produced. Varying wall thicknesses can result in uneven cooling rates during the molding process, leading to potential defects like warping or sink marks on the final part. To guarantee uniformity and structural integrity, it's essential to maintain consistent wall thickness throughout the design.
This not only enhances the overall quality of the part but also contributes to smoother mold filling and reduced cycle times. By carefully considering the wall thickness in conjunction with the selected surface finish, you can optimize the mold design for both visual appeal and structural soundness.
Optimize Wall Thickness Uniformity

Maintain that your design upholds a consistent wall thickness to promote uniform material flow during injection molding. This uniformity aids in preventing defects such as sink marks, warping, and porosity within the final product.
Ideal wall thickness within the recommended range is crucial for ensuring part integrity and overall quality.
Consistent Wall Thickness
To achieve the best resin flow and minimize defects during injection molding, maintaining consistent wall thickness throughout the part is vital.
Varying wall thicknesses can result in uneven resin flow, leading to defects like sink marks and warping. The ideal wall thickness range typically falls between 2.0 – 3.0mm to ensure part strength.
Uneven wall thickness not only affects the part's appearance but also disrupts cooling rates, impacting the final part quality.
Designing with uniform wall thicknesses is essential as it reduces material usage while enhancing overall part performance.
Material Flow Enhancement
Maintaining uniform wall thickness in injection mold design is crucial to optimizing material flow for enhanced part quality and structural integrity. Guarantee a consistent wall thickness of 2.0-3.0mm to promote even material distribution during injection molding. This consistency aids in consistent cooling rates, reducing the likelihood of defects such as sink marks and warping in the final molded parts.
Properly distributed wall thickness also helps prevent flow restrictions and incomplete filling, which can lead to part defects. Integrate appropriate draft angles and wall thickness variations to facilitate smooth material flow throughout the mold cavity.
Implement Draft Angles Strategically

When designing injection molds, it's vital to implement draft angles strategically. Draft angles, typically between 1 to 3 degrees, aid in the smooth release of parts from the mold, reducing defects and damage.
Draft Angle Importance
Implementing draft angles strategically in injection mold design is essential for ensuring successful part release and preventing damage during ejection. When designing injection molded parts, consider the following:
- Optimal Range: Draft angles typically fall within the range of 1 to 3 degrees, tailored to the specific part geometry and material properties for smooth ejection.
- Risk of Insufficient Draft: Inadequate draft angles can result in production setbacks, increased expenses, and potential harm to parts and molds.
- Benefits of Proper Draft Angles: Well-planned draft angles enhance moldability, minimize friction, and contribute to achieving flawless part surfaces.
Designers must prioritize draft angles early in the design phase to facilitate efficient manufacturing processes and uphold the quality of the final parts.
Draft Angle Guidelines
Consider incorporating draft angles within the recommended range of 1 to 3 degrees to facilitate efficient part release and prevent potential damage during ejection. Larger parts may require draft angles up to 5 degrees for proper ejection. Draft angles help reduce friction between the part and mold, preventing damage like scuffing or scratching. Insufficient draft angles can lead to sticking during ejection, affecting part quality. Proper draft angles are essential for eliminating cosmetic defects and maintaining part integrity. Below is a table summarizing draft angle guidelines and the concept of a zero-draft area:
| Draft Angle Guidelines | Zero-Draft Area |
|---|---|
| 1-3 degrees | Specific areas where no draft is applied to meet design requirements |
| Up to 5 degrees for larger parts | Critical for maintaining part features and functionality |
Implementing these guidelines strategically ensures successful injection mold design.
Draft Angle Optimization
Optimize your injection mold design by strategically incorporating draft angles to enhance part release efficiency and minimize potential damage during ejection. When enhancing draft angles, consider the following:
- Set angles between 1-3 degrees: Ideal draft angles aid in smooth part release from the mold.
- Strategic placement along parting lines: Placing draft angles strategically reduces friction, lowering the risk of damage during ejection.
- Prevent sticking and defects: Inadequate draft angles can cause parts to stick in the mold, leading to production delays and cosmetic defects like scuffing.
Utilize Radii for Stress Reduction

To enhance stress resistance in injection mold design, integrating radii on sharp corners is essential for ensuring part integrity and longevity. Radii play a fundamental role in reducing stress concentrations that occur during cooling and ejection processes, effectively preventing part failure.
By adding radii to corners, you can minimize shear forces and turbulence, ultimately enhancing the strength and durability of the final product. Additionally, proper radii help to facilitate smooth resin flow during the injection molding process, ensuring uniform filling and reducing the likelihood of defects.
Incorporating radii is especially important for pass-through cores, as they aid in easy part ejection from the mold without causing damage. By utilizing radii strategically in your design, you not only improve the overall structural integrity of the part but also safeguard against potential issues during the ejection phase.
Hence, when focusing on injection mold design for manufacturing, remember that integrating radii is an essential element in promoting stress reduction and optimizing part performance.
Manage Resin Flow Direction

Ensure resin flows efficiently by guiding it from thick to thin sections, preventing disruptions and achieving full part filling.
Minimize flow restrictions to enhance part quality and strength while reducing the occurrence of weld lines.
Controlling resin flow direction is essential for eliminating defects and achieving consistent part quality and dimensional accuracy.
Optimize Resin Flow
Promote proper resin flow direction within the mold to enhance part quality and prevent defects. When optimizing resin flow, follow these key steps:
- Guarantee resin flows from thick to thin sections: This promotes uniform filling and reduces the risk of air traps in the mold.
- Prevent flow marks and weld lines: By managing resin flow direction, you can avoid these common defects and ensure a smooth surface finish.
- Maintain consistent material distribution: Properly managing resin flow helps to avoid issues like uneven material distribution within the mold cavity.
Minimize Flow Restrictions
Minimizing flow restrictions within the mold design is essential for optimizing resin flow direction and ensuring efficient mold filling and high-quality part production. To achieve this, carefully consider the parting line and incorporate draft angles into the design. The parting line is where the two halves of the mold meet, and it should be strategically placed to allow for smooth resin flow without creating obstacles. Adding a draft angle to the mold walls facilitates easy part ejection and helps prevent flow disruptions. By addressing these aspects, you can enhance resin flow direction, reduce the risk of defects, and improve the overall quality of the molded parts.
| Flow Direction Tips | Benefits | Importance |
|---|---|---|
| Optimize parting line | Smooth resin flow | Prevent defects |
| Incorporate draft angle | Facilitate ejection | Improve part quality |
| Balance flow channels | Reduce pressure differentials | Enhance resin distribution |
Enhance Part Quality
To optimize the quality of your injection molded parts, carefully managing resin flow direction is crucial to ensuring proper filling and reducing the likelihood of defects. When it comes to enhancing part quality in manufacturing and part design, consider the following:
- Guarantee resin flow from thick to thin areas to promote proper filling and reduce the chances of defects.
- Proper management of resin flow enhances part quality and consistency in injection molded parts.
- Controlling resin flow direction aids in minimizing weld lines and ensuring uniform material distribution.
Assess Tolerable Molding Defects

How can you determine acceptable limits for molding defects in injection mold design? When evaluating tolerable molding defects, it is vital to contemplate the impact these defects may have on the functionality and aesthetics of the molded parts. By understanding common molding defects such as sink marks, flash, warping, and short shots, you can establish acceptable defect limits based on the specific requirements of the part being produced. Evaluating the severity and location of potential defects is essential in ensuring that the overall performance of the part is not compromised.
To help you better evaluate tolerable molding defects, consider the following factors:
| Defect Type | Acceptable Limitation | Impact on Part Performance |
|---|---|---|
| Sink Marks | < 0.1mm depth | Cosmetic |
| Flash | None | Dimensional |
| Warping | Within 1% of tolerance | Functional |
Minimize Strengthening Rib Sizes

Considering the impact of molding defects on part performance, optimizing strengthening rib sizes in injection mold design is key to minimizing material usage and reducing costs.
When designing ribs, remember to:
- Avoid Overdimensioning: Overly large strengthening ribs can lead to sink marks and warping in the final parts, impacting both aesthetics and functionality.
- Strategic Placement: Instead of increasing rib sizes excessively for structural reinforcement, strategically place ribs in areas where they can provide the most support without adding unnecessary material.
- Utilize Design Tools: Make use of rib design software tools to accurately optimize rib sizes and locations, ensuring efficient enhancement of part strength while minimizing material waste.
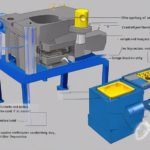
Eliminate Undercuts in Tooling

Eliminating undercuts in tooling streamlines manufacturing processes and reduces production costs to a large extent. Undercuts in tooling increase manufacturing complexity, leading to longer production times and higher costs. By designing tooling without undercuts, you simplify the molding process, speeding up production and decreasing expenses to a great degree. Undercuts can cause part defects and make ejection more challenging, impacting the overall quality of the final product. Addressing undercuts in tooling design is essential for enhancing manufacturability and ensuring a smooth production process.
| Advantages of Eliminating Undercuts | |
|---|---|
| 1. Faster Production | 2. Cost Reduction |
| 3. Improved Part Quality | 4. Easier Ejection |
Removing undercuts from your tooling design not only accelerates the manufacturing process but also results in cost savings. It improves part quality by reducing the risk of defects and makes ejection easier, contributing to a more efficient production workflow. Prioritizing the elimination of undercuts in tooling design is key to achieving excellent manufacturing outcomes.
Prioritize Design for Manufacturability

To enhance the efficiency and cost-effectiveness of your injection mold design, prioritize incorporating manufacturability considerations from the initial stages of the process. Ensuring that your design is manufacturable can have a substantial impact on the success of your injection molding project.
Here are three key factors to prioritize:
- Draft Angles: Integrate draft angles into your design to facilitate easy part release from the mold. Draft angles reduce friction during ejection and help prevent damage to both the part and the mold.
- Wall Thickness Uniformity: Maintaining uniform wall thickness across your part is important for achieving consistent resin flow and cooling during the molding process. Varying wall thickness can lead to defects like warping or sink marks.
- Resin Flow Considerations: Design with resin flow in mind to make sure that the material fills the mold cavity correctly. Optimizing resin flow paths and taking into account wall thickness uniformity can help prevent issues such as air traps and incomplete filling, resulting in higher-quality parts.
Utilize Rapid Prototyping for Validation

Incorporating rapid prototyping into your injection mold design process allows for efficient validation of design concepts before committing to costly tooling.
By creating a tangible model from your CAD design using rapid prototyping techniques such as 3D printing, you can quickly assess the design for any flaws or improvements. Rapid prototyping enables you to identify and rectify potential issues early on, saving both time and money in the long term.
Through prototyping, you can test the functionality and fit of various parts to guarantee they meet the desired specifications. This iterative process not only helps in refining the design but also contributes to achieving top-notch part performance.
Leveraging rapid prototyping for validation not only streamlines the design process but also enhances the overall quality and manufacturability of the final product. Make the most of this cost-effective tool to iterate efficiently and bring your design to fruition with confidence.
Frequently Asked Questions
How Can You Improve the Quality of Injection Molding?
To enhance injection molding quality, you must focus on factors like:
- Wall thickness uniformity
- Draft angles
- Corner radii
- Gate selection
- Collaboration with molders
Ensuring even cooling through proper thickness, aiding part release with draft angles, and reducing stress with radii boost part strength. Opting for tab gates and concealing ejector pin imprints improve resin flow and aesthetics.
Early collaboration and feedback with molders are key to preventing delays and ensuring high-quality injection molding.
What Are the Considerations for Injection Mold Design?
When designing injection molds, it's crucial to consider various factors:
- Wall thickness uniformity for proper cooling
- Draft angles for easy part release
- Radii for stress reduction and part strength
- Gating design for efficient resin injection
- Ejector pins for successful part ejection
These considerations ensure a well-designed mold that enhances the overall quality of the injection molding process.
What Things Could You Do to Improve Mold Design?
To enhance mold design, it is crucial to guarantee proper draft angles and incorporate radii for smoother flow. Additionally, optimizing resin movement for uniform filling is essential. Avoiding undercuts can simplify the manufacturing process. Carefully selecting materials and considering part geometry are important for efficient production and improved product performance.
These steps will aid in successful part release, reduce stress concentrations, and decrease defects. Ultimately, they lead to cost-effective and high-quality injection mold design.
How to Design for Injection Molding?
To design for injection molding, consider the following key factors:
- Wall thickness: Ensure proper resin flow and part strength with 2.0-3.0mm thickness.
- Draft angles: Use draft angles for easy part release and to prevent binding.
- Radii: Incorporate radii to reduce stress and aid resin flow.
- Smooth flow: Seamless shifts from thick to thin areas prevent sink marks.
Additionally, optimize gate design for efficient resin injection and seek feedback from molders for manufacturability.
Conclusion
To sum up, by incorporating these top tips for effective injection mold design, you can optimize the manufacturing process and guarantee quality outcomes for your products.
While some may argue that these design considerations may add complexity to the process, the benefits of improved surface finish, uniform wall thickness, and stress reduction far outweigh any initial challenges.
Remember, prioritizing design for manufacturability is key to success in injection molding.